Blog
How to Frag a Hammer Coral
How to Frag a Hammer Coral: The Complete Propagation Guide
Your hammer coral has been thriving in your reef tank for months now, those distinctive anchor-shaped polyps swaying hypnotically in the current. What started as a small two-headed frag has transformed into a magnificent colony with eight or ten heads branching outward. It’s beautiful, impressive, and honestly, it’s running out of room. Your torch coral neighbor is looking nervous, and you’re starting to wonder what happens when those sweeper tentacles start making contact.
This is the moment every successful reef keeper eventually faces: your coral grew exactly like you hoped it would, and now you need to do something about it. The solution is propagating your hammer coral by dividing it into multiple pieces. It sounds intimidating if you’ve never done it before, but the reality is that hammer corals are among the easiest corals to frag successfully. The process is straightforward, the success rate is high, and you’ll end up with multiple corals from your single thriving colony.
Let’s walk through everything you need to know about fragging hammer corals, from understanding the different types to making the actual cuts and ensuring your frags heal properly.
Understanding Hammer Coral Growth and Structure
Before you grab your cutting tools, it’s important to understand how hammer corals grow and what you’re actually working with when you frag them.
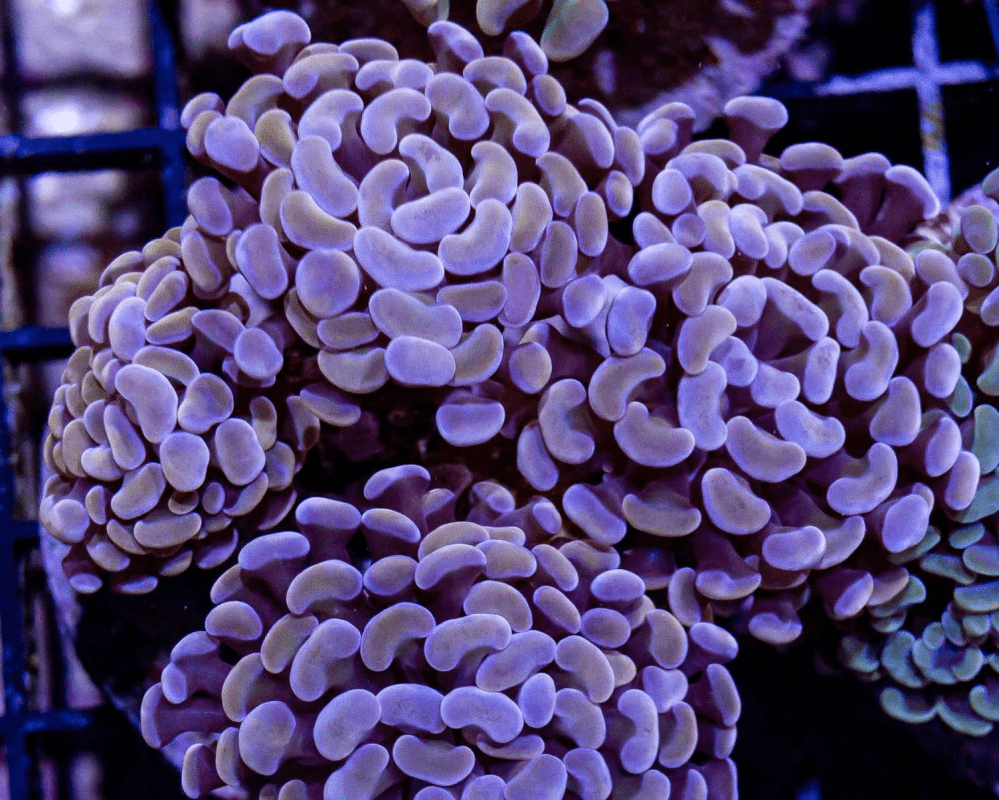
Hammer corals belong to the Euphyllia genus, making them close relatives of torch corals and frogspawn corals. They get their name from those characteristic hammer or anchor-shaped polyps that extend during the day. When you look closely at an extended hammer coral, you’ll notice the polyps can take different forms. Some have T-shaped tips that look like actual hammers. Others feature curved ends that pull back toward the tentacle base, resembling anchors. Still others display round, bubbly shapes that sometimes confuse beginners who mistake them for frogspawn, though hammer corals have distinctly shorter tentacles.
If you’re choosing hammer corals specifically for fragging purposes, branching varieties are almost always the better option. They’re more resilient, grow faster, and drag with far less stress to the coral.
Knowing When Your Hammer Coral Is Ready to Frag
Just because your hammer coral has multiple heads doesn’t automatically mean it’s ready for fragging. You need to assess whether the coral is healthy enough to handle the stress and whether the branches are actually large enough to create viable frags.
The first indicator of fragging readiness is overall coral health. Look for a thick flesh band around the skeletal edge all the way around each head. This fleshy tissue should be robust and colorful, not thin or translucent. While a thin flesh band doesn’t necessarily doom a coral, it does suggest the coral is investing more energy into skeleton building than tissue maintenance, which isn’t ideal before fragging. Fully extended tentacles during the day are another positive sign, though there’s nuance here too. Super long tentacles that appear thin and stretched often indicate the coral wasn’t receiving enough light or nutrients, while healthy tentacles have substance and presence without looking overextended.
The Dr. Reef’s Advantage: Starting With Quarantined Hammer Corals
If you’re purchasing hammer corals specifically for growing and fragging, starting with healthy, quarantined specimens gives you a tremendous advantage.
Dr. Reef’s Quarantined Fish offers hammer coral frags that have completed their coral quarantine protocol. These corals arrive at your door already acclimated to aquarium conditions, free from pests and diseases, and ready to thrive in your reef tank. The quarantine process involves sterile tanks that are fish-free, coral dips upon arrival and careful observation throughout the quarantine period.
When your Dr. Reef’s hammer coral arrives, you’ll follow their straightforward acclimation protocol. Float the sealed bag or container in your sump or tank with lights off for fifteen to twenty minutes for temperature acclimation. After temp matching, simply remove the coral from the transport container and place it in your tank. Light acclimation happens slowly, starting with the lower light levels and gradually moving the coral upward.
Starting with a healthy, pest-free hammer coral means you’re building from a strong foundation. Your frags will be healthier, grow faster, and experience fewer problems than frags taken from wild-collected or inadequately quarantined corals that might be harboring pests, diseases, or stress-related issues.
Final Thoughts on Fragging Success
Fragging hammer corals represents one of the most rewarding skills you’ll develop as a reef keeper. The process takes a thriving coral that’s outgrowing its space and transforms it into multiple colonies, each capable of the same growth and beauty as the original. You’re actively participating in coral propagation, reducing demand for wild collection, and building the skills that distinguish experienced reef keepers from beginners.
The first time you frag a hammer coral, you’ll probably be nervous. Your hands might shake slightly as you make the cuts. You’ll second-guess your technique and worry that you’re doing it wrong. That’s completely normal. But within an hour, you’ll have multiple mounted frags sitting in your tank, and within a week, you’ll see them extending their polyps and beginning to heal. Within months, those frags will be growing actively, and you’ll be planning your next fragging session.
The key to success is starting with healthy corals from reliable sources like Dr. Reef’s Quarantined Fish, using proper technique and clean tools, following through with iodine dips and appropriate placement, and then exercising patience while your frags heal and establish themselves. Hammer corals are remarkably resilient when given the right conditions. They want to survive and grow.
Before long, you’ll be the person in your local reef club with gorgeous hammer corals to share, the hobbyist friends turn to for fragging advice, and the reef keeper with the confidence to tackle more challenging propagation projects. It all starts with that first cut on a healthy hammer coral and the commitment to seeing your frags through to success.